October 6, 2022- Until now, large, geometrically complex objects such as die-cast aluminum parts for the automotive industry could only be measured validly at great expense. Testing in the measuring room requires a corresponding capacity and is time-consuming; so-called gage-check gages require a certain planning, procurement, and implementation time.
An innovation opens new possibilities: senswork developed the 3D measuring system ZScan, a solution that is always ready for use and provides a valid measurement result in seconds. And it does so directly in production.
"The investment was worth it" (Rocco Hahn, Head of Project Management, Magna).
It was the measurement speed and flexibility that convinced Magna of senswork's ZScan system. The automotive supplier had been looking for an optical measurement and inspection system suitable for series production for some time when the Bavarian measurement technology expert senswork came into play.
Was the investment worthwhile? "The summary is positive, definitely," say Rocco Hahn, Head of Project Management and Martin Emrich, Project Manager at Magna. The investment pays off after just a few product launches.
100% testing in pre-production and small production runs
Various die-cast aluminum components can be inspected for dimensional accuracy in seconds with this one system - and without any pretreatment. With this speed, the ZScan goes beyond the capabilities of a mere measuring system and qualifies as a production tool.
A capability study conducted by Magna, which compared the measurement results from the measuring room with those of the ZScan, confirmed its high measurement quality and the validity of the measurement results. Parts can be considered inspected by ZScan without further inspection in the measuring room. It offers a perfect and very flexible supplement in pre-series and small series production, in which every component leaves production 100% IO.
Up to 76% faster startup time
In the application, any component up to a length of 1.60 meters can be scanned with the flexible optical measuring system. Due to the component-unspecific application, processes in the start-up phase in particular benefit, precisely because type-specific measuring equipment procurement is also no longer necessary. The investment is lower, the speed higher. Start-up times for new products can be significantly accelerated with a time gain of several weeks compared to conventional solutions.
Production equipment with automatic CAD alignment
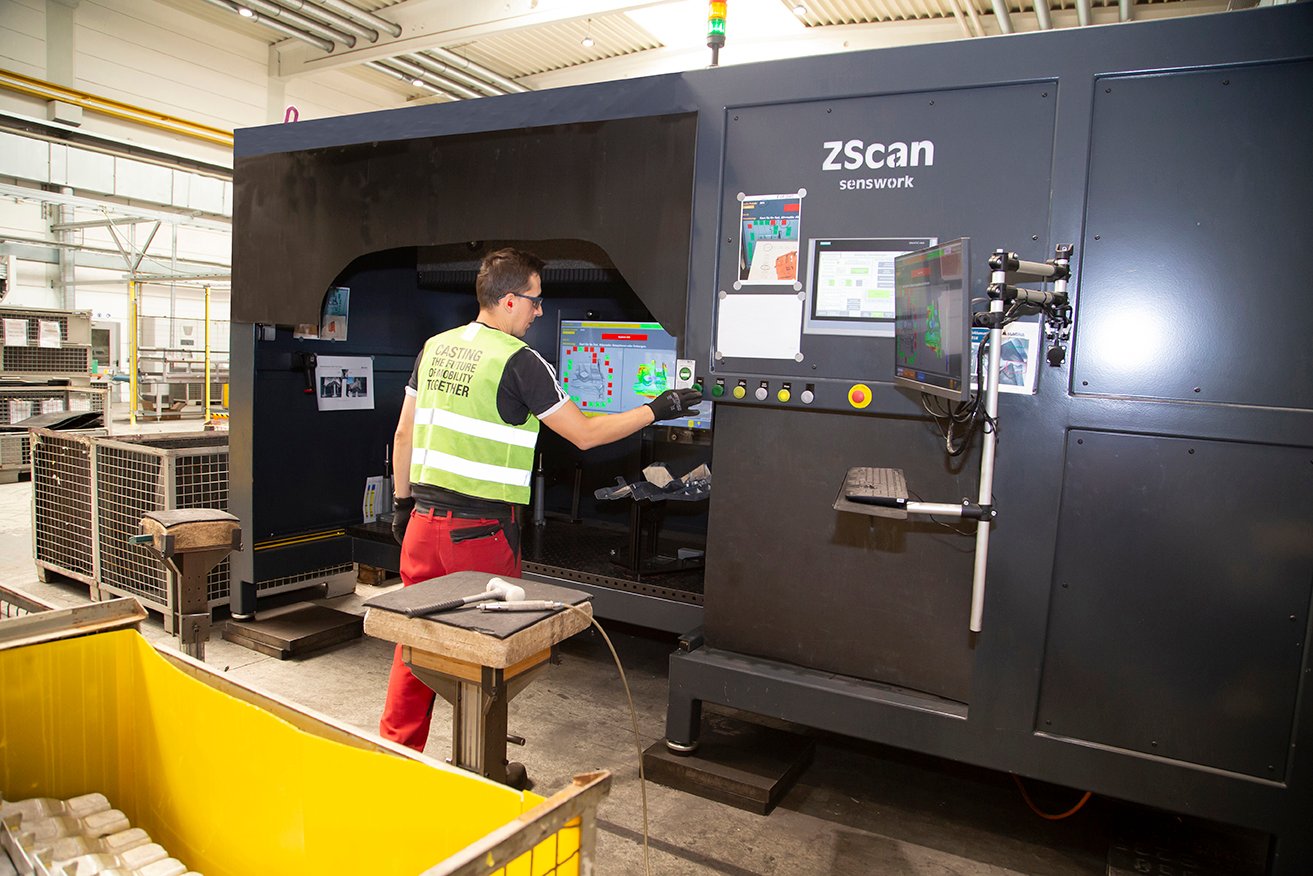
The inspection process also holds great functionality. Within a few seconds, the ZScan 3D multi-sensor scanner scans the aluminum die-cast part in question and automatically compares it to its CAD model. Four laser scanners, calibrated to each other, are used in this process. Thanks to their free spatial arrangement, they can detect even geometrically complex component surfaces with virtually no shadowing. ZScan also masters slightly shiny surfaces such as aluminum effortlessly - and without any pre-treatment.
The result IO versus NIO is displayed on a panel and shown as a precise 3D false color image as a red-green comparison in a flowing color gradation. In addition, the panel visualizes a free number of measuring points, which are evaluated according to the RPS system. The dimensional measuring points are displayed in green, over- and underruns of the tolerance or deviations from the nominal dimension in red and blue.
In combination with the additional quickly detectable false color image, the workers can make targeted geometry corrections directly following the measurement process, which takes only seconds. ZScan can thus be used efficiently as a production tool with a linked manual straightening process. Checks between and after straightening can be performed at any time and the process can be repeated until the IO result is achieved.
See more thanks to versatile measuring functions
Straightening processes are standard in the production of structural components made of die-cast aluminum, as is the case at Magna BDW. The heat treatment at almost 500°C introduces distortions into the objects, which have to be corrected again in the downstream process based on precise specifications. This is exactly where ZScan shows its strengths with up to 20 million measuring points per single scan: The combination of preceding RPS alignment, point-based 3D measurement and false color CAD comparison is particularly helpful in production: "You can see a lot of details that are not recognized in conventional measurement. In production, this is a bit of a blessing and a curse at the same time," says Rocco Hahn, Head of Project Management at Magna, "but it has definitely gone down well with the customer. The ability to digitize components ad hoc and compare data sets with each other is also very advantageous."
Easier process optimization
This functionality additionally offers engineers a great deal of insight regarding process optimization. Objects can be inspected before and after each production step, such as the heat treatment of aluminum die castings. Individual scans can be compared with each other, and shape deviations visualized in color. This provides greater insight into production processes at every step of the process. Measurement series can be created, archived, and evaluated by software with ZScan. The influence of parameter adjustments in the process is already made measurable in production. The process steps can thus be optimized in a data-based, targeted manner.
"We want to use it to produce parts and not just generate measurement quality" (Rocco Hahn, Head of Project Management, Magna).
And there is another special feature: not the trained measurement technician, but the worker himself operates ZScan directly in production. This allows it to be used as a production tool and at the same time saves capacity in the measuring room. "The user-friendly operation and clear component selection enables a very fast learning process for new employees of about 30 minutes, so that employees on shift can look after ZScan themselves," says Martin Emrich, project manager at Magna. Any employee can change the object. ZScan robustly withstands the demanding production environment with dust, contamination, and temperature fluctuations.

Presse Contact
Evelyn Haid
+49 8677 409958-5
evelyn.haid@senswork.com
senswork GmbH, Gewerbepark Lindach D 3, 84489 Burghausen


