Burghausen, 04. July 2022 – With the introduction of the new generation of VisionCommander® machine vision software, senswork is driving the digital transformation in the automation industry. The software for deep learning, 2D and 3D inspection offers intuitive operation and high performance for automatic inline inspection.
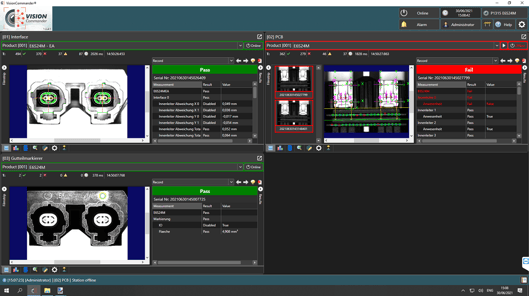
VisionCommander - a PC-based image processing software for optical inspection - supports 2D and 3D cameras and scanners from a wide range of manufacturers. The software can perform up to eight inspections in parallel in separate viewing windows. At its core, it has various calibration mechanisms for demanding measurement tasks.
The inspection results are stored in real time in an SQL database. The database enables detailed analysis and data tracing in production. A flexible statistics module also provides a quick overview of the current quality status in production.
The internal product management allows the product-specific creation of measurement and inspection characteristics. All characteristic data is automatically transferred to the internal statistics and database module after each test cycle.
Also integrated in the software is a comprehensive user administration with dynamic user lists and definable access rights.
Powerful software with all common interfaces
A big plus: now VisionCommander also supports first-class deep learning tools, such as senswork’s Neuralyze and VisionPro Deep Learning from Cognex. This makes the software suitable for sophisticated surface inspection, object recognition, object classification and crack detection.
Various additional tools such as film strips, logging on multiple levels and the import and export of deliverables make VisionCommander a powerful machine vision software that also supports all common interfaces such as GigE Vision, USB, GenICam, Camera Link, CoaXPress as well as the PLC interfaces Profinet, Ethernet-IP, Ethercat and ADS.
High performance 3D data processing
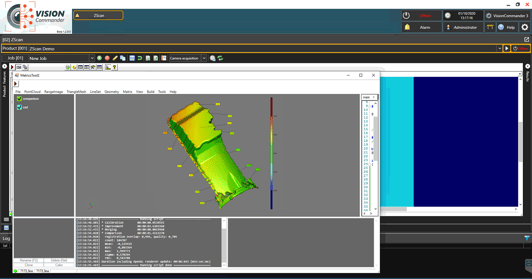
Another advantage of the image processing software is the extremely fast processing of 3D data. This includes the comparison against CAD, various alignment methods (best-fit, RPS, 3-2-1), volume determination, position detection or the detection of deformations or defects. In addition, the 3D functions also allow for the import and export of various 3D formats as well as multi-sensor calibration, which enables scanning with multiple sensors.
Monitored testing operation quality
With the help of the digital reference part inspection, inspection activities can be verified against a defined set of sample images and PDF reports can be generated. In order to be able to display inspection results on rework stations or separate workstations, senswork offers the VisionCommander DataAnalyzer, a useful add-on product.


Evelyn Haid
+49 8677 409958-5
evelyn.haid@senswork.com
senswork GmbH, Gewerbepark Lindach D 3, 84489 Burghausen


