Plug connections are essential in electrical engineering. Whether in the smartphone, in the car or in production facilities - they ensure that data or electricity flow from A to B. In order for this to work perfectly, the connector pins must fit perfectly on the circuit board or in the socket.
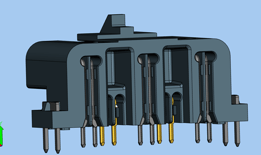
The production of plug connections is usually fully automatic: every second, metal strips are punched, wire cut, bent and pressed or soldered together. 50 to 100 plugs fall off the assembly line every minute. Several 100 pins per connector are lined up in a very small space.
The demands on the filigree, millimeter-sized pins are high: They have to maintain process-reliable tolerances of 0.1 millimeters and less with tight timing. And the trend is towards ever smaller, more compact systems that have to transmit more signals. If batches are faulty, this can in the worst case lead to product recalls and annoyed customers. In order to guarantee quality and precision, the plug connections must be checked continuously.
Virtual connector gauge replaces mechanical gauge
Mechanical test gauges are usually used to check the position of the individual pins. However, these have the disadvantage that the part can be scraped off or bent. If a pin is missing or has broken off, this cannot be identified with the mechanical insertion jig. In addition, the mechanical test is very complex and rigid - a separate grid gauge is required for each connector type.
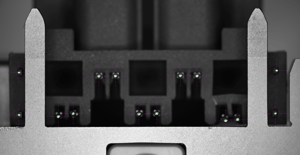
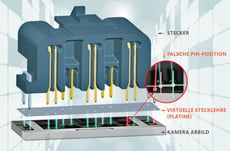
The Burghausen-based company senswork has now developed a measuring system that makes the test process much easier than before. In the first step, the specialist in industrial image processing creates a precise, virtual image of the circuit board hole pattern or the socket of the mating connector using a high-resolution camera system.
In the second step, the intelligent test software calculates whether the connector assembly is "pluggable" or not. Using an optimization process, the virtual teaching is iteratively shifted or rotated on a given pin situation in the image until either a solution is found (all pins can be plugged in) or the method is canceled if no further improvement can be achieved.
Advantages of the virtual insertion gauge
The big plus point of the virtual insertion gauge: The measurement is carried out inline. The decision as to whether a plug can be plugged in or not takes a maximum of 20 milliseconds with an average of 20 to 1000 iterations per inspection. “The process is also very flexible and can basically be used for all connector types. Different test programs need only be created for different pin configurations, ”explains Rainer Obergrußberger, managing director of senswork. Since the process works without wear, abrasion or damage to the pin group due to the test method is excluded.


Press Contact
Hedwig Unterhitzenberger
+49 8677 409958-37
hedwig.unterhitzenberger@senswork.com
senswork GmbH, Gewerbepark Lindach D 3, 84489 Burghausen


